


Blogs
|
Hey, edtech gurus! It’s Tuesday again and time to focus on another resource that can be utilized in the educational setting. This week I’m turning things over to my one of my rock star colleagues, Susan Oxnevad, who will be sharing some awesome info about one of my all-time favorite tech tools: ThingLink.
For those of you who are familiar with this tech gem, you’ll just love, love these news updates to both the web version and the app. However, if you haven’t subscribed to the ThingLink craze yet, there are now even more reasons to make this one of your go-to classroom tools. And here’s why…
ThingLink is pleased to announce verified accounts for school districts along with the release of an updated iOS app that is well suited for educational use, making ThingLink EDU better than ever for teaching and learning!
Benefits of Verified District Accounts
A verified organization on ThingLink EDU serves three goals. First, verification is used to establish authenticity of an organization. Once this is done, the organization gets an invitation code that can be used to easily invite staff and students to ThingLink EDU. A verified organization account will be equipped with a dashboard to easily manage teachers, students, and groups. Third, a verified organization account gives schools and districts easy access to all of the ThingLink resources created by teachers and students across the district. These features make it easier than ever for teachers and students to create, share and curate multimedia rich content with ThingLink.
ThingLink iOS app Updated for Educational Use
More great news! The ThingLink iOS app has been updated with education in mind. When browsing for existing ThingLink content, students can only see images created by other teachers and students. Safe-search has been enabled to provide students with age appropriate content when searching for media to annotate images. The updated version of the app now includes student and teacher signup options with invitation codes, making it easy to manage students and engage them on mobile devices like never before.
Explore this slideshow channel of interactive image to learn how ThingLink can be used on a fieldtrip on a mobile device without wireless. Be sure to click the arrow to advance to the next image to see how students can extend the learning at school and at home, using whatever device is handy at the moment.
Link to channel here.
About ThingLink for Education
Over the course of this past year, ThingLink has become one of the the most popular free web tools for educators. The ThingLink app has become the most popular mobile app for creating interactive images in school or on field trips with or without wireless access. There are truly endless possibilities for using ThingLink in education.
Teachers can create media rich visual resources packed with content to engage students in deep learning experiences. Students can create a ThingLink to present knowledge and ideas or to document learning. A shared "Steam" enables students and teachers to collaborate on images beyond the classroom walls. Interactive images can be embedded on websites or shared with the class and accessed by inquisitive students at any time.
Explore this guided, student driven learning project ,powered by ThingLink and Google Apps, to view the possibilities that exist for teaching and learning with ThingLink EDU.
Link to image here.
ThingLink Keeps Getting Better
As an early adopter of ThingLink I immediately fell in love with the tool because of the flexible options for creating rich media images for teaching and learning. I recognized the potential for using ThingLink to create differentiated resources to support all learners and I loved the fact that I could pack a lot of content into one image. At that time, the only icon available for adding tags was one black circle, the only embeddable media I knew of was YouTube, and there were no special features for education. Since then, ThingLink has come a long way. Over the course of the past year, ThingLink has introduced a full-featured education platform with a designated classroom workspace for teachers and their students. Here are just some of the features:
Signup has become simpler with the addition of the Google Appls for Education login.
Teachers have the ability to create accounts for students without email.
District and teacher level management provide teachers with the tools to efficiently manage the ThingLink Classroom.
Students and teachers can now create slideshow channels of related interactive images to share work, curate content or maintain interactive learning portfolios.
The original black icon is now one of many colorful icons that include several icons designed for education.
Teachers with premium accounts have the ability to create their own custom icon sets!
The app for iOS and Android makes it easier than ever to use ThingLink on a mobile device, with or without wireless.
ThingLink for Video provides teachers and students with the ability to annotate a video and turn it into a personalized, interactive learning tool.
Learn More About the ThingLink Classroom
Link to image here.
Request a Verified Status for Your Organization?
ThingLink has the ability to transform teaching and learning, so grab your verified district account, add the updated iOS app and embrace this amazing EDU tool!
Send an email to support@thinglink.com.
About the Author
Susan Oxnevad is the ThingLink Education Community Manager, as well as an instructional technology coach in an elementary school district outside of Chicago who is passionate about using technology as a tool for learning. Susan provides professional development for busy teachers via a variety of online and in-person opportunities. Susan blogs about thoughtful ways to incorporate technology as an efficient and effective tool for learning on her own blog, Cool Tools for 21st Century Learners, and on the ThingLink Blog. Email Susan@thinglink.com for resources, ideas and inspiring ways to use ThingLink across all content areas. Follow her on Twitter @soxnevad.
Edutech for Teachers team
.
Blog
.
<span class='date ' tip=''><i class='icon-time'></i> Jul 15, 2015 11:36am</span>
|
|
OK, it’s that time of year again when teachers, students and mathematicians from all over the world honor the fun-loving irrational Greek figure pi (π). That’s right! March 14 is Pi Day, and you won’t want to miss this opportunity to make a lasting impression on your math students!
Let’s get the party started with TeachPi.org site, a one stop shop on the Web for finding and/or sharing teaching and learning ideas related to Pi Day. You name it and TeachPi.org most likely has it: lessons, stories, music, digit games, poetry, art and even tattoos!
My favorite part of the TeachPi.org web site? A link to the original gangsta rap, "Lose Yourself (In The Digits)," a parody of the well-known Eminem hit. Check out the video below created by students at the Fort Vancouver High School using the lyrics to this song.
Here’s another fun Pi video set to the tune of "American Pie" by Don McLean. BTW—this is the G-rated version!
And now for some interactive fun… Check out this multimedia sensation created by ThingLink guru Mathy Cathy containing a variety of super cool activities and info related to Pi Day.
Classroom Connection:
Use the Pi Day resources and materials to generate some enthusiasm and appreciation for mathematics. And while you’re at it, have a piece of your favorite (chocolate peanut butter) pie!
Edutech for Teachers team
.
Blog
.
<span class='date ' tip=''><i class='icon-time'></i> Jul 15, 2015 11:35am</span>
|
|
Happy Tuesday, edtech fans! Yeah, I realize we’re about 72 hours from having a TGIF moment, but the good news is you have three days left in the week to incorporate this super cool tool into classroom activities!
So, here it is: The next time you need an engaging prewriting or postreading activity for your students, then be sure to check out the Cube Creator from ReadWriteThink, an interactive that provides students with a visual organizer to summarize information in one of the following categories:
» Bio Cube: This option allows students to develop an outline of a person whose biography or autobiography they have just read. It can also be used before students write their own autobiography. Specific prompts ask them to describe a person’s significance, background, and personality.
» Mystery Cube: Use this option to help your students sort out the clues in their favorite mysteries and/or develop outlines for their own stories. Among its multiple applications, the Mystery Cube helps students identify mystery elements, practice using vocabulary from this popular genre, and sort and summarize information. Specific prompts ask students to describe the setting, clues, crime or mystery, victim, detective, and solution.
» Story Cube: In this cube option, students can summarize the key narrative elements in a story, including character, setting, conflict, resolution, and theme. Students can even identify their favorite part of the story.
» Create-Your-Own Cube: Working on a science unit? Doing some research on volcanoes? Then Create-Your-Own Cube is the answer! This version allows teachers and students to generate their own questions or topics and/or customize cubes on topics of their choosing.
Check out a sneak peek of this nifty interactive shown below.
A "Planning Sheet" accompanies each Cube Creator template. Since space is limited on the cube, students can utilize this chart to organize and summarize information prior to completing the online activity.
As students respond to prompts on each side of the cube, a fun-shaped, organized chart of information is generated. Once complete, the finished cube can saved, printed and folded into a tangible representation of the topic—one that can be shared with others!
Classroom Connection:
Unlike traditional prewriting and postreading web or charts, the Cube Creator is a fun and visually engaging tool to use. Besides requiring the students to identify key elements, this activity challenges them to create a comprehensive summary of their topic.
Lesson ideas for integrating the Cube Creator interactive into the elementary, middle and high school classroom can be found here.
Edutech for Teachers team
.
Blog
.
<span class='date ' tip=''><i class='icon-time'></i> Jul 15, 2015 11:33am</span>
|
|
Back after a short hiatus, here’s the latest edition of Edu-fun Friday, a series devoted to adding some humor to the lives of teachers who visit this blog. After all, there’s nothing better than ending the week on a positive note! Plus, do we have the best topics to provide us with some comic relief or what?
And on top of that, I needed a laugh this morning when I had to take my dogs for our daily jaunt in three inches of snow (and counting) on the first day of spring! What the what?
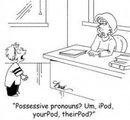
Anyway, I guess this comic points out that our teaching jobs are secure after all… Ha!
Edutech for Teachers team
.
Blog
.
<span class='date ' tip=''><i class='icon-time'></i> Jul 15, 2015 11:32am</span>
|
|
Even though there is always a mind-boggling amount of invaluable info shared on the Discovery Education Network (DEN), one of the best resources available is the Spotlight on Strategies (S.O.S) series, a must-see DEN favorite designed to provide teachers with simple yet effective instructional practices for using digital content to support student learning.
To date, there are 70+ teacher tried and tested strategies featured on the DEN blog and now thanks to Lance Rougeux, Vice President of Learning Communities and Educational Consultants at Discovery Education and all-around DEN tech guru, I will now be featuring these techniques on my space. Two thumbs up to this guy!
So, enough of that. Let’s fast forward to the good stuff…
On tap this week: A-E-I-O-U, a visual literacy strategy that focuses on teaching student how to interpret information related to classroom content as well as how to express their learning in multiple ways.
Big Idea
As students, particularly language learners, are developing their ability to interpret information, it is important that we provide multiple paths for them to express what they see, know, and wonder about content being covered.
Cumminsʼ research featuring the four quadrants of scaffolding students from BICS to CALPS, combined with an instructional strategy like A-E-I-O-U, allows learners of all levels to contribute to the conversation.
Steps
Materials: video segment, paper, writing tool
1. Preview the video segment and select appropriate points at which to pause for students to jot notes.
2. Show video segment. Important: As students watch the video, do not have them take notes. If they look down to take notes, they will be missing content. Assure them you will pause the video every few minutes for them to jot down their thoughts related to the following categories:
» A = Adjective: List a word or two that describes something you saw or learned.
» E = Emotion: Describe how a particular part of the segment made you feel.
» I = Interesting: Write something you found interesting about the content/topic.
» O = Oh!: Describe something that caused you say "Oh!"
» U = Um?: Write a question about something you learned or want to learn more about.
3. Pause at the predetermined points to allow students 60 seconds to add information to their list.
4. When the movie concludes, have students complete a Pair & Share of their A-E-I-O-U statements.
5. Regroup as a class and have students share their favorite parts.
For an added bonus, have students re-enact the image.
Sum It Up
This strategy provides scaffolding that helps students look for and remember key ideas about the information presented in the video segment. It also provides a conversation structure for debriefing with classmates and reporting out, in small groups or as a whole group.
More Ideas
Have students create a vocabulary list of different emotions they experienced while watching the video segment. Each time you use this strategy, have students add to an ongoing list of adjectives that they can refer to as they engage in writing activities throughout
the year.
Click here to snag a PDF version of this super cool strategy.
So, there you have it—another S.O.S. trick to add to your edtech toolbox. Stay tuned for additional ways to activate learning in your classroom…
Like what you see? Then be sure to check out other ideas in this series:
» Reading Between the Lines
» ABC Summary
» 6-Word Stories
» What Did They Say?
Edutech for Teachers team
.
Blog
.
<span class='date ' tip=''><i class='icon-time'></i> Jul 15, 2015 11:30am</span>
|
|
And so the good news is… Stuff just got a little "tackk-y" on the edtech scene. What am I talking about? Well, according to the latest scoop, ThingLink just hooked up with a pretty nifty cool tool called Tackk, a free service that can be utilized to quickly create simple webpages similar to a digital flyer or poster to announce important events, classroom or school information and/or to highlight digital projects and media.
But that’s not all… By establishing a new partnership with ThingLink, Tackk has taken its coolness to the next level by providing users with the option to embed interactive images into a "Tackkboard". Sounds like an app smashers dream come true, eh?
Check out an example of this wicked cool mixup of web tools shown below.
Click here to view a full screen version of this Tackk.
In addition to including web links, Tackk pages can also accommodate text, photos, videos, audio, maps, forms and there’s even an RSVP option. Users do not need to register for an account to create a Tackk; however, unregistered pages expire after seven days.
Classroom Connection:
Because images have become the new storytelling platform, both ThingLink and Tackk have a variety of uses in almost every subject in education. And now that these two edtech gems have joined forces, the possibilities for use in the classroom are seriously endless.
In addition to reviewing the image shown below highlighting a variety of ways Tackk can be incorporated into the classroom, check out the education section of Tackk which includes examples and ideas for using this cool tool with students. Personally, my most favorite way to make use of Tackk is to have students create digital portfolios to showcase photo, video and/or audio projects. How cool would a Tackkboard filled with original student generated media be!
As for ThingLink, check out previous posts I’ve written about the many ways one of my edtech favorites can be used to engage students in the learning process here, here and here.
And now just imagine how app-solutely awesome it will be to smash the two of these resources together to create one hip masterpiece!
Edutech for Teachers team
.
Blog
.
<span class='date ' tip=''><i class='icon-time'></i> Jul 15, 2015 11:29am</span>
|
|
As Quincy Jones once remarked, "I’ve always thought that a big laugh is a really loud noise from the soul saying, "Ain’t that the truth."
That said, Edu-fun Friday is a series devoted to adding some humor to the lives of teachers who visit this blog. After all, there’s nothing better than ending the week on a positive note! Plus, do we have the best topics to provide us with some comic relief or what?
I don’t know about you, but iLaughed [out loud] at this one! Ha, ha!
Edutech for Teachers team
.
Blog
.
<span class='date ' tip=''><i class='icon-time'></i> Jul 15, 2015 11:29am</span>
|
|
Hey, Edutech for Teachers fans! This chick just got a facelift. Yep, check out my new identity—the official Geeky Girl logo that I’ll now be using in conjunction with print and digital projects as well as social media.
A ton of props go out to my friend and beyond talented graphic artist, Tom Worthington II, for making the design I visualized in my mind one cool reality. You’re the bomb!
Edutech for Teachers team
.
Blog
.
<span class='date ' tip=''><i class='icon-time'></i> Jul 15, 2015 11:29am</span>
|
|
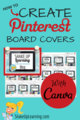
How To Create Pinterest Board Covers with Canva Want to Make Your Pinterest Boards Shine? Create matching board covers with Canva to help you and your students navigate your Pinterest boards with ease! By now you have figured out that Canva and Pinterest are two of my favorite digital tools! Pinterest is such a popular tool among teachers! It's great for professional learning, and creating boards for your students. Why not get organized, and create beautiful covers for your boards? It's easy with Canva! Here's a birds-eye view of my Pinterest boards. Most of my boards, the ones that I own and use for education, have custom covers that I made using Canva. It makes it very easy to see the title of the board, and gives me an opportunity to use my own branding. Canva makes this task a cinch! I've detailed steps below. Here's a birds-eye view of my Pinterest boards. Most of my boards, the ones that I own and use for education, have custom covers that I made using Canva. It makes it very easy to see the title of the board, and gives me an opportunity to use my own branding. Canva makes this task a cinch! I've detailed steps below. Shake Up Learning on Pinterest Step 1: Get a Canva Account! Trust me, this tool is incredible. You will find so many ways to use this design and image tool in your classroom. Your students will love it, too. More on that later...Go ahead and get your account set-up, I'll wait... Step 2: Create Your Canvas with Custom Dimensions. There are many templates in Canva for all types of social media, posters, presentations, and more. The Pinterest board cover is NOT in the list at the top. You must choose custom dimensions. Use Custom Dimensions The correct size for a Pinterest board cover is 217 x 147. Enter these dimensions, and click Design! 217 x 147 Step 3: Design your Pinterest board cover! The next screen will give you options for the layout. Canva Toolbar I usually start by choosing a background, but you can work in whatever order suits your creativity. Backgrounds can be solid, patterns, or images. You can even use custom colors, which is how I made my boards match my website and blog. Choose a Background You can search for images, frames, icons, lines, and much more to add a professional touch to your design. You can even upload your own images, as I did with my avatar. Upload Images For an effective and professional Pinterest board cover, make the title of your board as large as possible so it can easily be read on your profile. You may need to reconsider the names of your boards, as I did. Short and sweet works best on the cover. You can add plain text, and choose from some great fonts! You can also try the special text holders to add a little flair. Add Text Step 4: Download Your Image. Click Download or Link in the top-right, then choose image. Download Image Publish Image Step 5: Upload Your Image to Your Pinterest Board. Login to your Pinterest account, and click on the + sign near the top-right of the page. Choose Upload a Pin. Navigate to your new Canva image, and add it to the board for which it is named. Upload a Pin Step 6: Set the Image as the Cover. Now, go to your profile page and hover over the board you wish to edit, and click on the Change Cover button. Use the arrows to navigate to your new image. (It should be the first one). Once selected, click Save Changes. Change Board Cover That's it! Now you can return to Canva and make a copy of your board cover to create more covers with a matching theme! Canva is a phenomenal tool for the classroom as well. Students can use Canva to create images for presentations, blog posts, posters, research projects, and more. There are so many ways that you can use this tool! I use Canva to create images for the blog posts you see here, in my presentations, and across social media. Both Canva and Pinterest made my list of 10 EPIC Tools I Can't Live Without. Pinterest is a great way to connect and learn with other educators. Be sure you check out my list of 35 Educators You Must Follow on Pinterest. How do you use Canva? Please share in the comments below. Visit Shake Up Learning's profile on Pinterest.
Shake Up Learning Blog
.
Blog
.
<span class='date ' tip=''><i class='icon-time'></i> Jul 15, 2015 11:29am</span>
|
|
Editing Images in Google Docs and Slides Add some pizazz to your images in Google Docs and Slides! Did you know you can crop, add borders, and even reshape your images in Google Docs and Slides? This feature has been around for just a few months, and it a great feature for students and teachers! Editing images give you the abilitity to add a professional touch to your presentations and documents. Inserting Images To begin, insert an image into a Google Document or Slide by going to the Insert>Image. Navigate or search for the image you wish to insert. (Please see my previous tip: Image Search Tricks Every Teacher Must Know!) Once you have located the image, select or open to add it to the document or slide. Resizing Images (Google Docs and Slides) You can easily resize images by selecting the image and clicking and dragging the blue "handles" until you have the desired size. To keep proportions, click and drag from the corners instead of top, bottom and sides. Cropping Images (Google Docs and Slides) Double-click the image you wish to edit, or click on the crop button in the toolbar. Please note, one click gives you the blue handle bars for resizing and moving. A double-click will give you the new cropping tools as seen below. Click and drag the black cropping bars on the corners and sides to crop your image. Select the area you wish to crop, then click Enter on the keyboard or click the crop button on toolbar to crop the image. (Cropped Image) Add a Border (Google Docs and Slides) You can easily add a border or frame to your images using the special toolbar that appears when your image is selected. First choose your color using the dropdown next to the pencil tool. The second tool allows you to choose the weight of the line. The third tool even lets you change to border to a dots or dashes. (Image with 4pt orange border) Reshaping Images (Google Slides only) Google Slides gives you an additional feature. You can reshape you images in Google Slides for added effect. Select the image, and then click on the drop-down arrow next to the crop button in the toolbar, then choose your shape. Voila! A new shape for your image! Below is an example. There are many different shapes to choose from that will add a little something extra to your presentations. Hansueli Krapf, Aerial View of the Crop Circle in Diessenhofen, Attribution ShareAlike 3.0 Reset Images Back to Original (Google Docs and Slides) Don't like the changes? Just click on the reset image button to return the image back to the orginal size and shape! This is just scratching the surface of the many ways you can enhance your Google Documents and Slides with images. Stay tuned for more Google Tricks and Tips! Check out my other Google Tricks and Tips! What are your favorite Google tips? Please share in the comments below. Subscribe to this blog to get all the latest posts: Follow My Blog with Bloglovin Follow My Blog with Feedly RSS
Shake Up Learning Blog
.
Blog
.
<span class='date ' tip=''><i class='icon-time'></i> Jul 15, 2015 11:28am</span>
|