


Blogs
|
Need a cool tool to transform words into neat visuals? Then look no further than Quozio, a very user-friendly web resource that turns any quote into a nifty image.
It works something like this: Just enter the desired text in the field provided followed by who said it in the next box then click the "Go" button. And boom—within a matter of seconds, an image is generated. Next, scroll through the various styles available on the site and find the one that best matches your message. To save your masterpiece for use in print and digital projects, simply right click on the image and use the "Save image as" command.
So, how much does Quozio cost? Ummm… It’s totally free so hopefully you’ll find some room in your budget for this tech gem! If you love the tool, then pay it forward by offering up some "web currency"—a Facebook like. Yep, show ‘em some love on all of your social networks.
Do I need an account to use Quozio? Nope. Just have at it. No account, no sign-up, no email address required. However, if you do chose to create an account you can save your favorite quotes, share ‘em with your peops on Facebook, Pinterest, email and all that kind of cool stuff.
As an added bonus, there’s even a Quozio bookmarklet which allows users to instantly create an image from any text that is highlighted on a web page.
Check out my very first Quozio image shown below.
Classroom Connection:
Besides using quote images to pimp out your classroom with inspirational messages for students, there are a variety of really cool ways they can be utilized for academic purposes as well. Check out the following resource for a plethora of excellent suggestions: Ideas for Using Quotes in the Classroom.
That said, whether you’re a teacher or a student, Quozio is an excellent tool for generating quote visuals.
Be sure to visit the following blog posts that also discuss additional tools that can be utilized to create images: ReciteThis and QuotesCover.com.
Edutech for Teachers team
.
Blog
.
<span class='date ' tip=''><i class='icon-time'></i> Jul 15, 2015 01:28pm</span>
|
|
Having recently attended an e-assessment workshop at Duchy College where I saw a presentation about using Xerte to create educational resources for students with learning difficulties, it prompted me to write about this excellent tool. It has many benefits for the student which I will list in this article, but one of the best plus points for Xerte is that by using the online toolkit, anyone can create a resource which looks great, is very accessible and can be used as a formative assessment or revision tool.
Xerte has been created by staff at the University of Nottingham and as it is an open resource, it is available to download and use free of charge. The Xerte website has some excellent examples of the type of resource which can be created and you can download the online toolkit from there also.
Creating accessible resources.
The presentation at the e-assessment event was delivered by Lisa Featherstone of JISC TechDis. Lisa has many years experience of working with students with learning difficulties. Lisa demonstrated a Xerte object she had created with various learning difficulties in mind. By selecting the link, you will be able to view the template.
Xerte templates allow users to control the colours and font sizes by using the options shown at the bottom of the resource and can be resized by using the tools in the browser. Templates can be navigated by both mouse and by using keyboard commands. There is also a text-to-speech interface available.
Xerte objects can be created to suit all aspects of learning difficulties such as attention and memory recall, auditory, visual and motor. The University of Nottingham has created an excellent template to show examples of this in action.
Using Xerte to create revision tools
Lisa Featherstone also demonstrated a learning object which showed an example of a revision tool. Xerte online toolkits lend themselves well to the creation of a self-contained revision/self-assessment package where key points could be displayed and a series of questions could be asked around the key points. The points could also be summarised at the end of the template, allowing users to recap. This resource can be used over and over by both academics/creators and students. Xerte learning objects are accessible anywhere where users have access to a computer and an internet connection.
Using Xerte online toolkits to create assessments
The online toolkit can create a very effective assessment package which looks professional and is easy to use from a student perspective. For formative assessment, it can be used in the same way as for the revision tool. A content creator could add key points and demonstrate these by adding props such as video or audio content, images which can have features such as drag and drop added and creating a series of questions from multiple choice to text match. For summative assessment, the same format would be ideal, but the only drawback is that Xerte online toolkits have no functionality for recording student activity or marks. However, this issue can be worked around by linking the Xerte template to a QuestionMark Perception assesment from within the Xerte template. Perception is currently the online assessment tool which is used at Plymouth University and is capable of recording student activity. This has been done successfully by the Human Resources (HR) department at Plymouth University. They wanted to use Xerte to create a high quality suite of resources for staff to access online around various HR policies and procedures. The idea is for staff to access the resources and work through the Xerte templates, then answer questions at the end. Because it is essential to achieve a certain score, the assessment at the end is linked to Perception and the mark is recorded and can be accessed by HR staff.
Which disciplines are suitable for using Xerte?
The answer to this one is, all disciplines. The flexibility of Xerte templates allows resource creators to add and embed a variety of different features which can be tailored to suit the particular discipline. For example, Arts could create a Xerte template containing images of famous paintings with accompanying information. Hotspots could be added to the images allowing users to zoom in on a particular aspect of a painting. The University of Nottingham Medical School has been using Xerte to create a series of templates to assist students in principles of anatomy.
If you would like any more information about using Xerte, please contact the Learning Technologies team.
Technology Enhanced Learning
.
Blog
.
<span class='date ' tip=''><i class='icon-time'></i> Jul 15, 2015 01:28pm</span>
|
|
As Quincy Jones once remarked, "I’ve always thought that a big laugh is a really loud noise from the soul saying, "Ain’t that the truth."
That said, Edu-fun Friday is a series devoted to adding some humor to the lives of teachers who visit this blog. After all, there’s nothing better than ending the week on a positive note! Plus, do we have the best topics to provide us with some comic relief or what?
Pretty funny! But why do I think this day is really coming…
Edutech for Teachers team
.
Blog
.
<span class='date ' tip=''><i class='icon-time'></i> Jul 15, 2015 01:28pm</span>
|
|
Drag the map with your mouse. View in full screen by clicking on the icon
Mindmapping:
Mindmapping is really a graphical method of planning or taking notes. They can be really useful for brainstorming and planning content. They can also be used as a presentation tool at conferences - see Andy Black: ‘Mobile Learning & Online Communication’
MindMeister:
As you can see above, a fully functioning MindMeister map can be embedded into a page and viewed in full-screen. Other good features…
The ability to:
preview external links with a thumbnail image when you rollover the icon
add notes which can be viewed when you roll over the icon
attach a file, such as a pdf, accessed via the icon (see e-Portfolio/ PebblePad)
upload your own images or use the rather nice ones provided (shown above)
link elements with a customizable arrow (see e-Portfolio > Webfolio)
collaborate in real-time with a chat function (enabled when you click on a collaborator’s name)
assign specific tasks to collaborators, listing priorities and due dates
revert to a previous version if a mistake is made
make live updates to your map when it has been published and embedded
Create, edit and display on mobile devices - iPhone, iPad and Android - free to download from the App Store
MindMeister Editing Screen
This map has been created using a Basic (free) account which allows you to have 3 maps. Other paid options are available - this free version is very impressive!
Can you recommend any other mindmapping software? What do you use them for?
Technology Enhanced Learning
.
Blog
.
<span class='date ' tip=''><i class='icon-time'></i> Jul 15, 2015 01:28pm</span>
|
|
Training and Enabling Franchisees Infographic
Training and enabling your franchisees is essential to your company’s success. The Training and Enabling Franchisees Infographic provides 10 tips on how to train and enable your franchisees better. In this infographic you will learn how to get your franchisees to feel like part of the family, create content that works and how to better engage your franchisees!
How to train and enable your franchisees better
Introduce the parent company: Its culture, values, beliefs and war stories. Prepare franchisees to represent you with high fidelity.
Create a culture of learning. Add development resources as circumstances demand. Google always thinks mobile first; the desktop is an afterthought.
Provide an online, current operations manual written as if the franchise has no experience in the industry.
Take advantage of peer-generated content. When people find something others need to know, they document it. Need to share it.
Be spare. Less is more. Compress file drawers into job aids and a few pages. Shrink the lesson into small chunks.
Take on major initiatives first. Then sell your success.
Surprise your audience with news, convenience and utility.
Support the workflow. Don’t add additional burdens.
Design programs to be usable by as many workers as possible: iPhones, Androids, tablets and computers.
Tell stories to create imagery, emotions and understanding of events.
Via: www.litmos.comThe post Training and Enabling Franchisees Infographic appeared first on e-Learning Infographics.
eLearning Infographics
.
Blog
.
<span class='date ' tip=''><i class='icon-time'></i> Jul 15, 2015 01:28pm</span>
|
|
‘eGo’ make the web work for you! from Flea Palmer
Note: Presentation updated Feb. 2013 to reflect LinkedIn Profile changes and include Pinterest as a portfolio tool..
This new presentation was created in response to a graduate workshop I ran in collaboration with the Careers Department as part of their ‘Boost Your Confidence’ series of workshops. What attendees, who came from a range of disciplines, wanted to know was:
how to manage a Public Facebook Profile
how to use LinkedIn most effectively, and what should be included in a LinkedIn Profile
This will form the basis of future workshops, referring to my own public profiles as working examples. It is also timely as this recent article, ‘Why a traditional CV isn’t always enough‘ (29th May 2012) from the Guardian illustrates.
Here are some further resources you may find useful..
See Plymouth University’s Social Media Strategy and further advice documents. (University log-in details required)
‘Facebook for Beginners‘ - A general guide to using Facebook from mashable.com
Get Started with LinkedIn - a series of videos from LinkedIn’s Learning Centre specifically for students. Guides are available for Job Seekers, Entrepreneur and more professions.
10 Tips to a More Professional LinkedIn Profile - Useful tips from hongkiat.com
8 Creative Tips to Help You Maximise Your New LinkedIn Profile Page for 2013 - advice from Neal Shaffer, President of Social Media Strategy Consultancy Windmills Marketing
‘Learn LinkedIn: how to build your living resume‘ - Download this booklet for free from makeuseof.com
‘Blogging for Teaching & Learning’ - A SlideShare Presentation/ Tutorial, by the South African Department for Education, with helpful explanations and tips
Do you have any tips or links to resources that may be useful for recent graduates looking to develop their online presence?
Technology Enhanced Learning
.
Blog
.
<span class='date ' tip=''><i class='icon-time'></i> Jul 15, 2015 01:28pm</span>
|
|
Last spring my Tech Club students wrote and produced a video about the importance of recycling in our school and submitted it to a contest sponsored by the Intermunicipal Relations Committee of Blair County. Not only did their work earn top honors in the local competition, but the winning video was automatically entered into the State Professional Recyclers of Pennsylvania FilmFest Contest for a chance to win statewide recognition as well as a cash prize.
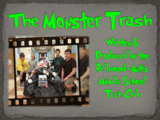
Well, the votes have been tallied and you guessed it: We recently received word that "The Monster Trash" won first place at the 7th annual competition which was held this past July in Washington, PA.
How cool is that? Even better, the video will be used in future public outreach and educational programs around the state.
When asked about the victories, Aubree Reiter stated, "I am very proud that the Tech Club won the video competition because I think our video really explained the point of the recycling contest."
Fellow techie Kermit Foor added, "I think that out of all of the videos we have made, this one was the best one yet. We worked for many hours during and after school to make this video. Without the help of our teachers and friends, it would not have been possible."
A shout out to my Tech Club crew—especially Aubree, Kermit, Alex, Blake, Corey and Quintin—for your dedication to this project. It’s proof that hard work really does get noticed and rewarded! I am beyond proud of your efforts, and you should be too!
Be sure to check out "The Monster Trash" below.
So, is that video just awesome or what? My most favorite parts are those in which these trashy students used stop animation to create various scenes! And yes—doing so was their idea!
As I’ve previously mentioned—I love, love the skills my girls and boys continue to learn and/or hone as they create these kinds of projects! Can you say rigor, relevant and real-world? Does it really get much better than that? I don’t think so!
Edutech for Teachers team
.
Blog
.
<span class='date ' tip=''><i class='icon-time'></i> Jul 15, 2015 01:27pm</span>
|
|
As I have mentioned in a previous post, I use Twitter on a daily basis as an excellent way of connecting to other Learning Technologists and educators across the globe. I recalled seeing some tweets around using Google docs to create quizzes. As someone who is very interested in all matters concerning e-assessment, I decided to look into this.
What I discovered was that it is actually very simple to set up. You create the quiz using a form template. You can create multiple choice, multiple response, drop down list questions, along with a couple of others. There are some limitations, one of the main ones being that you can’t add images, but this may be possible soon as Google is continually updating.
The biggest benefit of creating a quiz with Google docs is that you can record students’ marks (which you can’t do with a lot of other free e-assessment software). There are a couple of ways of doing this which involve having to create formulas in the spreadsheet, but there is another free tool accessible through Google Docs called Flubaroo, which automates the marking process.
One of the things that the Google forms allows you to do is to embed your quiz into a web page, which makes it easy for your students to access. you could embed the quiz into one of your module pages in the student portal, or you could embed it into a reusable learning object (RLO) such as Xerte.
I was keen to pursue this avenue as I can see a lot of potential here. Xerte is easy to use and it is possible to create a neat little teaching resource and you can embed your Google quiz at the end. I have put an example together and the link can be found below.
https://xerte.plymouth.ac.uk/play.php?template_id=758
I also intend to create training material detailing how to create the quizzes and how to generate reports. This will be available as a downloadable document and a video.
In the meantime, if anyone is interested in finding out more about this, contact the LT team. tel@plymouth.ac.uk
Technology Enhanced Learning
.
Blog
.
<span class='date ' tip=''><i class='icon-time'></i> Jul 15, 2015 01:27pm</span>
|
|
How to Get the Most From Think - Pair - Share Infographic
Think-pair-share is an instructional strategy where the teacher stops lecturing and asks students to consider a question (think), turn to a partner (pair), and discuss their response with the partner (share). The How to Get the Most From Think - Pair - Share Infographic explains what’s so great about Think - Pair - Share and how you can get the most from it!
What’s so great about Think - Pair - Share?
It breaks content into bite-sized pieces. The brain can only process so much at one time. To learn material, you need to interact with it. Think-Pair-Share offers a quick way to do that.
It gets students active. It takes them out of "sitting and getting" mode and puts them into talking mode. Verbally processing the material creates new pathways for learning it.
It provides novelty. Talking with a peer is a unique experience with the content; this makes it more memorable.
It allows for formative assessment. If you listen as students talk, you can immediately gauge who gets it and who doesn’t.
It requires almost no prep. You can literally call for a Think-Pair- Share any time, with nothing planned in advance.
Getting The Most From Think - Pair - Share?
Explain why you’re doing it. Tell students about the benefits of the strategy: You’ll get more buy-in and better participation.
Set up pairs ahead of time. If partners are chosen before you start, everyone will be ready when you ask the first question.
Select a "Person A" and a "Person B." …or whatever you want to call them. During the share, announce whose turn it is and switch halfway through. This ensures equal participation.
Ask a specific question. Give students some direction about what they should discuss. If you just tell them to talk, the conversations may lack quality.
Listen. Instead of checking e-mail or tuning out, circulate and listen to student discussions. You’ll get valuable information about student understanding and keep them on task.
Debrief. After pairs discuss, call on a few to share with the class.
Via: www.cultofpedagogy.comThe post How to Get the Most From Think - Pair - Share Infographic appeared first on e-Learning Infographics.
eLearning Infographics
.
Blog
.
<span class='date ' tip=''><i class='icon-time'></i> Jul 15, 2015 01:27pm</span>
|
|
The University has now updated all its lectern software to TurningPoint v5 (image1).
image 1. TurningPoint 5 interface
Those that have used this system before will notice that the new interface is different to the previous version and now incorporates a three in one software package. ‘PowerPoint Polling’ is the most commonly used ‘TurningPoint’ application, but I would urge users to check out ‘Anywhere Polling’, which can be used with any software or interface and will give you more flexibility when using this system. Finally, one of the strengths of this particular system is the user ability to test the software and presentation locally by using a simulation mode (image 2) and without the use of the Personal Response System (PRS) equipment (the clickers - image 3)
image 2. Simulation mode dropdown
image 3. Clicker & Dongle (receiver)
Here are a few links which you may find useful when using these devices:
You can download the latest software (TPv5) from here: http://www.turningtechnologies.com/responsesystemsupport/downloads
You can find ‘TurningPoint’ support pages here (tutorials etc): http://www.turningtechnologies.com/responsesystemsupport/producttraining/new_tutorials.cfm
Here are a few YouTube videos I found interesting, but there are many more if you search online for them:
Getting started with TurningPoint - An instructors view (duration 2m 34s) - http://www.youtube.com/watch?v=Wcy4_DlkbOY&feature=relmfu
Dr Eric Mazur - Turning lectures into learning - Keynote… (duration 1hr 7m - this is long I know, but he does raise some valid points) Dr Mazur makes use of TurningPoint ‘Anywhere Polling’ in his keynote http://www.pearltrees.com/#/N-s=1_3638920&N-fa=3577358&N-u=1_411048&N-p=56623531&N-play=1&N-f=1_3638920
If you would like to tryout TurningPoint, or use it with your own students, then contact the Learning Technology team who have 80 clickers for testing purposes.
Contact details:
The Learning Technology team
Room 105,
3, Endsleigh Place.
Phone: 01752 587600
E-mail: TEL@Plymouth.ac.uk
Technology Enhanced Learning
.
Blog
.
<span class='date ' tip=''><i class='icon-time'></i> Jul 15, 2015 01:27pm</span>
|