


Blogs
|
This represents the first in a new category of posts here on my blog that I’m calling a "Deep Dive." Rather than, as I have before, recapping every lesson, in every grade, every week, I’ll periodically choose a lesson or unit per grade level for an in-depth reflection. As always, my goal is to give parents & caregivers in our school community the resources needed to extend student learning at home, and to share my professional practice with teacher colleagues around the world in the hopes of improving my craft.
Paper Laptops 2.0 | 9/1/2014 - 9/17/2014 | First Grade
Standards: NJCCS Technology K-2 8.1.2.A.1, 8.1.2.A.2, 8.1.2.A.3, 8.2.2.A.1, 8.2.2.F.1
Objectives: I wanted students to understand that computers are collections of individual components, each with a different function. I wanted to give them the chance to examine, explore and identify hard drives, memory, CPU, and keyboards and understand what each part does as a portion of the whole. Finally, I wanted to have them assemble a paper laptop with keyboard, screen and mouse, for them to use and keep.
Inspiration: Came across the paper laptop idea years ago on the web - not sure where - but as soon as I saw it, I knew I could use it to teach about computer components, keyboarding, proper laptop care and more.
Overview: This lesson was two parts: for the first, students learned about real components by examining disassembled laptops donated by local families. We discussed each part, what it does, and how it connects to the other parts. Students then built their paper laptops by gluing paper keyboards, screen, mice, components (cutouts - hard drive, CPU & RAM) onto to manilla folders.
Non-functional laptops, graciously donated by members of the community, carefully disassembled by me so the components could be safely handled by my first grade students.
First grade students explore a disassembled PC laptop.
"Components" glued to the underside of the keyboard (something new I added this year.)
Ready for customization / personalization.
Once the laptops were created, we talked about and kids had to identify important keys on the keyboard - a.k.a. ‘Power Keys’ like enter, space, backspace as well as the power button and the letters needed to spell their names. We concluded with an assessment that required them to match up the components with the "analogies" I’d created (and presented the week before). When we were done, they got to take them home.
What Went Well / What I’m Glad I Did:
Disassembled, real laptops added important perspective to this lesson. The kids really enjoyed handling the parts, flipping them over, comparing them, and in some cases, putting them back where they actually belonged. It was great fun to watch.
The "flip up keyboard" was essential to allow the "components" to be glued to the "motherboard" underneath.
The review of the ‘Power Keys’ helped the kids know where certain keys are, and, finding the letters of their name was a task everyone could relate to and accomplish.
What Could Have Been Better / What I’ll Do Differently Next Time:
I think we need to go into greater depth with regards to the function of the components, perhaps having a discussion rather than me leading a presentation. I’d like to hear the kids describe what they think the parts do.
For the assessment, I think I will take a less active role, and just provide the pieces they need before going through the concepts one last time - then let them loose and see what happens.
Conclusion
This remains one of my favorite lessons and I am convinced the enhancements this year helped the kids learn more and have more fun in the process.
-kj-
Kevin Jarrett
.
Blog
.
<span class='date ' tip=''><i class='icon-time'></i> Jul 15, 2015 06:38am</span>
|
|
As a new practicing instructional designer, I was astonished at the quantity and breadth of writing that was required in this field. Over the years, I’ve needed to write on-screen text, audio scripts, video scripts, training manuals, marketing copy, help documentation and technical explanations. Along the way, I’ve filled in my education gaps through various classes, books and other sources.
So I was pleased to come across Roy’s Writing Tools, a podcast in iTunes University. It features Roy Peter Clark, author of Writing Tools: 50 Essential Strategies for Every Writer, as he reads and discusses key points to improve writing. Here I’ve selected some of Clark’s best tips that are applicable to learning experience designers. In some cases, I’ve modified his tips to apply to our type of work.
Order words for emphasis
Order your words with awareness. Place emphatic words either at the start or end of a sentence or paragraph. If at the end, the period acts as a stop sign—a pause—which magnifies the preceding word. In a paragraph, final words adjoin white space, giving the preceding words greater strength.
Weak example: The faint of heart are not well-suited for project management.
Strong example: Project management is not for the faint of heart.
Use adverbs only when they change the meaning of a verb
Adverbs are meant to enhance a verb, yet writers often select adverbs that are redundant with the verb. For example, in the following phrases, the adverb is redundant to the meaning of the verb it modifies: smiling happily, effortlessly easy, astonishingly amazed. Removing the redundant adverb makes a sentence shorter, stronger and to the point. This is my favorite tip because it’s a quick way to transform weak writing into powerful writing.
Weak example: She smiled happily. (We assume someone is happy when they smile.)
Strong example: She smiled sadly. (Now this is intriguing.)
Set the tempo with varied sentence lengths
Create a tempo through the purposeful use of long and short sentences. Use long sentences to establish a flow and to move things forward. Use short sentences to simplify complex explanations or to create suspense in a scenario. Let sentence length match the content and your purpose.
Go light on the "ing" form of verbs
Use the simple present or past form of verbs rather than the "ing" form. According to Clark, "ing" can weaken a verb for two reasons. First, it adds an additional syllable to the verb and secondly, a series of verbs ending with "ing" begin to sound alike. Verbs without "ing" demonstrate their unique distinctive form.
Weak example: Getting to the company retreat involved hiking, rowing, swimming and carrying a heavy pack.
Strong example: To get to the company retreat, we hiked, rowed, swam and carried a heavy pack.
Use repetition to link parts
Repeating key words and phrases provides structure to the written and spoken word. Purposeful repetition creates a rhythm, giving emphasis when you are making a point or stressing a theme. It’s difficult to write a paragraph on repetition without repeating the word too often.
But give important words their space
Isn’t there always a qualifier? Don’t repeat key words unless you’re looking for the effect discussed above. Recognize the difference between intended and unintended repetition. When you edit, take out key words that are repeated in the same sentence or paragraph, because important words need space to show their impact. Seek elegant variation in your writing.
Make your writing concise
In a very relevant segment, Clark recommends that you prune writing by cutting big, then small. This refers to cutting out passages that do not support your focus. This is a key tip for instructional writing where designers are often pressured to add extraneous content to please SMEs or clients. Remove content inserted only to please someone else.
Good writers read for both form and content
Don’t overlook how much you can learn from analysis and study of different genres of writing. Clark notes that we can learn to write better captions by reading old magazines, to explain clearly by reading cookbooks, to create intriguing headlines from tabloids and to craft dramatic scenes by reading comics. All of these are skills that learning experience designers might be expected to produce.
Like other sophisticated and nuanced skills, writing is an infinite and ongoing process. Similar to visual design, it’s impossible to reach the final goal. All we can do is continually work at it with increased knowledge and awareness.
Reference:
Roy’s Writing Tips: iTunes University
Writing Tools: 50 Essential Strategies for Every Writer
Add to this list. Share your writing tips below.
Post from: The eLearning CoachBecome A Better Writer
Connie Malamed
.
Blog
.
<span class='date ' tip=''><i class='icon-time'></i> Jul 15, 2015 06:38am</span>
|
|
It’s been almost a year in the making, but Hour of Code (#hourofcode) 2014 is about to get underway here at Northfield Community Elementary School!
Last year, we did #hourofcode activities primarily in Second Grade. While we did allow kids in other grades to explore some of the online resources, second graders got the most exposure.
This year, we are EXPANDING #hourofcode activities to the ENTIRE elementary school: all 500 students in Kindergarten through 4th grade. I’m writing this blog post to provide an overview of our plans, explain how we got here, and highlight what we hope to achieve.
Scope, Objectives & Approach
Let me begin by saying what we have planned for this year would not be possible without the MASSIVE increase of support and effort from a variety of organizations getting behind the movement. The quality and quantity of instructional materials, games, videos, and the like has EXPLODED since last year … and we’re leveraging quite a bit of it.
Last year, we focused for the most part on Second Grade (coding is an ‘area of focus’ for that grade level). Students primarily worked with Scratch. The response was encouraging. Kids had a great time, there were spontaneous high-fives everywhere, and thanks to a gentle scaffolding of activities, everyone was successful.
This year, thanks in large part to the dramatic increase in fantastic instructional resources, particularly those aimed at early learners (non-readers, even) we are pushing #hourofcode down to Kindergarten & First and up to Third & Fourth grade … and adding a significant home-to-school connection (since a single class session is NOT going to be enough.)
So, in a nutshell, here are our plans for #hourofcode 2014 at Northfield Community Elementary School:
Kindergarten and First Grade
Web-based activities (selected tiles on the Kindergarten & First Grade Symbaloo’s).
Offline, "Unplugged" Activities and Demonstrations.
Student Pair Programming (as needed).
Tynker Accounts for exploration at home with Mom & Dad or ???
Second Grade
Tynker Accounts for individualized, self-paced instruction (at school and at home).
Web-based activities (selected tiles on the Symbaloo).
Hands-on coding activities using http://scratch.mit.edu/. Complete tutorials.
Provide instructions for creating and using code.org accounts at home.
Third & Fourth Grades
Tynker Accounts for individualized, self-paced instruction (at school and at home).
Web-based activities (selected tiles on the Third and Fourth Grade Symbaloo’s).
Hands-on coding activities using http://scratch.mit.edu/. Complete selected tutorials, make stuff.
Provide instructions for creating and using code.org accounts at home.
There is a lot of redundancy here for several reasons. We had a bad experience with Tynker last year. It didn’t work! I placed nearly all my educational eggs in one basket and had to scramble (bad pun, sorry) big time when overwhelming demand effectively shut the service down for us. I am pretty sure they have secured additional servers for 2014, and I still feel Tynker’s curriculum and approach are THE BEST AVAILABLE for our purposes at NCS. That’s why we’ll focus on it. (I also love the way Tynker has allowed me to EASILY create INDIVIDUAL student accounts [utilizing the same username and password as Google Apps] with customized curriculum FOR FREE.) We will have OTHER activities too, some to be done "offline" in class, others designed to be accessed at home and explored with Mom & Dad or other adults and siblings.
My actual lessons are still being finalized - and a lot of school-home communications still need to be created - but, that’s why teachers have nights and weekends, right? (No way all this is going to get done on my "prep!")
How We Got Here
A lot has happened in the 12 months since #hourofcode last year. First and foremost, interest in this topic has SKYROCKETED. Coding is being talked about EVERYWHERE it seems. The resulting interest has generated an enormous amount of extremely high quality teaching materials and the backend infrastructure needed to make them work on a school-wide scale. (My life would be a lot easier if I had a single classroom - planning for entire grade levels, and this year, the entire elementary school, would be essentially impossible without the materials I have access to today.) We also had the opportunity to successfully "pre-test" some of the newest learning tools with our Kindergarten students, further convincing me we needed to "go big" this year.
But - should everybody learn to code? For some perspective on the question, check out the terrific article of the same name written by Esther Shein for Communications of the ACM, Vol. 57 No. 2, Pages 16-18 (yes, those are two of my students participating in #hourofcode last year.) Handy fun fact: I majored in Computer Science as a freshman in college. I … hated it! To this day, my programming skills are rudimentary. In many ways, I am learning along with the kids. So, there’s that. Point is, coding ISN’T for everyone, but, I believe EVERYONE should be INTRODUCED TO IT, so THEY can decide if it’s something they are interested in and want to invest additional time and effort.
What We Hope to Achieve
This year, #hourofcode is much, much more than a week’s worth of lessons for a single grade level. It is an organized, deep, multi-sensory, scaffolded learning adventure with components at school AND at home. Thanks to the dramatic increase in available activities, and the increasing ubiquity of mobile devices, kids have a greater opportunity than ever before to explore programming at their own pace, at their own level, and go as far, as fast, and as deep as they can.
For this year, I want…
In Kindergarten & First Grade: for students to enjoy exploring the puzzle activities we have already experienced and push further and conquer available lessons designed expressly for non-readers. Also, to give advanced students a chance to forge ahead.
In Second Grade: for students to conceptualize the coding process and be able to create their own basic programs (and be encouraged to continue to further develop those skills at home.)
In Third and Fourth Grades: for students to be able to use the available tools to create their own programs and games, whether at school or at home, and to solidify their interest in coding as a fun learning activity (and maybe even more).
Still reading? Awesome! Stay tuned, there’s more to come!
Mr. Jarrett
Kevin Jarrett
.
Blog
.
<span class='date ' tip=''><i class='icon-time'></i> Jul 15, 2015 06:38am</span>
|
|
When I get time I am still playing with the beta version of Storyline - the new standalone e-learning authoring tool from those wonderful people at Articulate. I can’t say a lot about the beta because as beta testers we had to agree not to disclose details but we are now able to use Storyline to work on real client projects. I’m not planning on doing that just yet but I thought I’d whet your appetite by pointing you towards a couple of demos that Tom Kuhlmann has shared on his Rapid e-Learning blog recently. You may already have seen them and thought - ‘I don’t recognise that Articulate player?’ Well the reason you don’t recognise it is it’s the ‘standard’ Storyline player. These demos don’t do very much but it gives a flavour of the sort of output you can get from Storyline. The last example shows a screen walkthrough - Storyline has a Screenr like tool built into it. This is going to be a cool new tool in 2012.
A Disaster Can Strike
Are you Prepared?
Screen Walkthrough
John Curran
.
Blog
.
<span class='date ' tip=''><i class='icon-time'></i> Jul 15, 2015 06:38am</span>
|
|
When you are about to get surgery or your airplane is preparing for take off, don’t you desperately hope the surgeon or pilot had training that transfers to the real world? With that same passion, we should try to ensure the training we design and develop is transferable to the workplace or to authentic life situations.
Learning transfer refers to acquiring knowledge or skills in one context that enhances a person’s performance in another context. This is known as positive transfer.
According to educational researchers, a person must be sufficiently engaged in a learning experience in order to correct, modify and refine his or her existing knowledge structures to promote transfer of learning. Here I’ve sifted through some of the research to find strategies we can use to meet this goal.
1. Provide opportunity for reflection and self-explanation
Reflection strategies encourage people to expand on what they are learning and to identify where they have deficiencies in order to correct them. Metacognitive strategies like these encourage people to be aware of their own thinking as they are learning.
To implement this approach, instruct learners to study in a meaningful way so they monitor their comprehension of the content. Provide prompts where learners must give reasons for their decisions or use a reflection questionnaire. Researchers used this approach in simulated aviation training to teach a safety principle and got the highest transfer rates using self-explanation. Still, transfer was less than 70%. (Molesworth et al.)
2. Vary modalities
Adding voice narration to complex simulations—rather than using textual explanations—can improve learning transfer. According to multimedia learning theory, balancing the presentation of material across both visual and verbal channels prevents a learner’s cognitive resources from being overloaded.
In one study, participants viewed a complex computer-network training simulation. The modality of the tutorial (text, narration or narration plus text) was varied between subjects and then learning transfer was measured in a timed activity transfer test. Participants who received the voice-only tutorial performed better on the transfer task compared with students who received the text tutorial. (Mayrath et al.) Keep in mind that narration-only was most effective when explaining an animated and complex simulation. Text with narration might be effective in other contexts.
3. Use a random practice schedule
Research shows that sequencing practice tasks in a random way can increase retention and transfer after but not during training. A typical instructional design pattern would be to present practice material sequenced in separate blocks (practice task 1, practice task 2, practice task 3 etc.). Although this improves performance during training, it is not as effective as using a mixed practice when it comes to a post-test and on-the-job transfer.
One study examined critical thinking and predictive judgment skills in scenario-based exercises. Researchers found that increasing the interference between training tasks by using random sequencing is a way to provide exposure to many different types of problems. (Helsdingen et al.) Most likely, this provides a more realistic simulation of the types of critical thinking and quick judgments required of emergency, military and management jobs.
4. Use relevant visuals rather than text alone
Many studies demonstrate that learning is enhanced with explanatory pictures. Visuals can decrease cognitive load and improve retention and transfer. To benefit from this effect, provide opportunities for learners to attend to the pictures and to integrate visual information with the narration or text. Often, explicit instructions to examine the visuals are helpful.
In one study, learners who took an eLearning course that included relevant visuals achieved higher retention and learning transfer scores than those whose course did not include pictures. In addition, those who saw visuals perceived the content as less difficult. (Schwamborn et al.) Although this particular study used high school students as participants, it’s safe to say that relevant visuals enhance learning for all age groups.
5. Enhance social learning at work
In many careers, the work itself is a learning experience. Learning transfer and work become one process as the individual continuously acquires knowledge and applies it. For these individuals, learning transfer is enhanced and improved through social learning. As workers discuss and problem solve, they apply their knowledge to new situations.
In a study that analyzed the work practices of design engineers and product developers, researchers found that these professionals learn through shared problem solving and shared practices as well as from the experiences and mistakes of others. To implement this approach, create a community of practice with an open atmosphere for discussion (whether online or in person). (Colin) In these situations, learning experience designers can place themselves in the role of community manager.
Conclusion
Apparent changes in performance during training are not necessarily indicative of improved performance on the job. Learning transfer is defined as the ability to apply what has been learned to novel situations and tasks. Appropriate use of any of the five strategies above should improve transfer of learning. To understand what works and what doesn’t, ensure that post-training tests measure application of knowledge and skills to new situations rather than the recall of facts alone. Also observe learners on the job or discuss the effects of training with supervisors to see what improves performance.
References:
Colin, Kaija. Connecting Work and Learning in Industrial Design and Development in Towards Integration of Work and Learning.
Haskell, Robert. Transfer of Learning.
Helsdingen et al. The Effects of Practice Schedule and Critical Thinking Prompts on Learning and Transfer of a Complex Judgment Task, Journal of Educational Psychology 103 (2011) 383-398.
Mayrath et al. Varying Tutorial Modality and Interface Restriction to Maximize Transfer in a Complex Simulation Environment, Journal of Educational Psychology 103 (2011) 257-268.
Molesworth et al. Promoting learning, memory, and transfer in a time-constrained, high hazard environment, Accident Analysis and Prevention 43 (2011) 932-938.
Schwamborn et al. Cognitive load and instructionally supported learning with provided and learner-generated visualizations, Computers in Human Behavior 27 (2011) 89-93.
Post from: The eLearning CoachHow To Increase Learning Transfer
Connie Malamed
.
Blog
.
<span class='date ' tip=''><i class='icon-time'></i> Jul 15, 2015 06:38am</span>
|
|
It’s Monday, December 8th, the first day of CSEd week, an event honoring two different pioneers in the Computer Science field: Grace Hopper, the first American computer scientist and United States Navy rear admiral to boot; and Ada Lovelace, an English mathematician who wrote the first computer program … 100+ years before the first computer was created! Hopper’s birthday is December 9th; Lovelace’s is December 10th. An interesting coincidence, no doubt - and a valuable context as we as a nation embark on a week of discovery and learning about coding in specific and computer science in general … a male-dominated field that was essentially created by women!
Every day this week, I’ll feature a different grade level and an explanation of the activities we’ve got planned. My goal is to encourage the learning to continue at home, and even expand, with family support. Since programming is an area of focus for my Second Graders, I’ll be starting with that grade level. Here’s the Second Grade Symbaloo and a quick rundown of the learning activities I’ve made available on it:
Tynker: self-paced, 11-lesson set designed to walk students through the basics of coding. The login credentials are the same as the kids use for Google Apps: their full NCS email address and their Google Apps password. Upon logging in, click the blue robot in the circle to access the lessons I’ve selected. BONUS! The good folks at Tynker added a NEW section today specifically for Hour of Code (you see it once you log in.) The activities within that section labeled "BEGINNER" are appropriate for most 2nd graders. Tynker is our main focus this week, provided the service works for us in class (it did not last year.) Kids will however be able to select ANY of these activities in class based on their interest and ability. I also want to encourage my students to try Tynker at home with parents or an older sibling nearby for support if needed. It’s that good!
Hour of Code Course #1, Stage 3: solve puzzles to learn the basics of coding! These are our go-to activities in Kindergarten and 1st grade and might be a good refresher for second graders.
Hour of Code, Course #1, Stage 4: building on Stage 3, the blocks and programming get slightly more complicated, but not too much so. Everyone loves Angry Birds!
Hour of Code, Course #1, Stage 5: More Angry Birds, but this set of activities focuses on debugging or correcting the code.
Getting Started with Scratch: a simple project designed to show how the programming language Scratch operates. Refer to the "Step Index" on the right and follow the instructions.
Google Blockly - Maze: can you code "Pegman" to complete the series of progressively more challenging mazes?
Google Blockly - Turtle: create art by programming a turtle to draw as it walks!
Light-Bot: one of the best single activities available, this activity (revamped for this year) requires students to program a robot to light up squares as he walks. The coding takes place by dragging and dropping blocks onto a grid. You remove them by dragging them off. Some of the higher level puzzles can be tricky!
Bot-Logic: more of a logic game than a programming lesson, this activity challenges kids to move a robot through a series of increasingly more complicated mazes. Watch out! You’ll be required to add loops and other interactive components to complete them all!
Dancing Yeti: drag and drop code blocks to create a unique dance for the Yeti to perform! Many easy to manipulate variables.
Hour of Code Course 2: this is the ENTIRE 20-HOUR Hour of Code Course #2 for kids who can read but are new to programming. Some of the activities are included above; plenty of others, including the offline ones, are not.
Remember, we only have one 40-minute class together this week. There is obviously more content on the Symbaloo above than can POSSIBLY be completed during that time! I am making these activities - with various levels of difficulty - easily available so that students and their families can work on them at home, together. What will you learn today?
Have a great week!
Mr. Jarrett
Kevin Jarrett
.
Blog
.
<span class='date ' tip=''><i class='icon-time'></i> Jul 15, 2015 06:38am</span>
|
|
Bullets make lists of important points easy to read. When those near-perfect little circles are vertically aligned, readers can quickly process the text. Yet too many bullet lists in an eLearning course or slide presentation can be repetitious and mind-numbing.
Learners and audiences need novelty to maintain and sustain attention. The trick for going beyond bullets is to think visually. By sprinkling in alternatives to bullets here and there, your minimal use of bullets will be more effective.
Here are six bullet alternatives you can create in a any graphics program or in PowerPoint. Of all these approaches, which ones do you think are best? Please comment below.
Alternative 1: Use text boxes
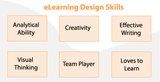
A simple alternative to a list is to place each item into a a text box that is arranged in a suitable layout. With this approach, each point is more pronounced than in a list. It can also be accomplished easily with basic graphic tools and in PowerPoint. Below, what could have been a bullet list of eLearning design skills is placed in horizontally arranged text boxes with a 1 pixel border.
Alternative 2: Let icons do the talking
Using the same text boxes as above, this approach adds icons to the words. Notice the appealing effect of adding small and simple pictures to each box. For some learners, the image may work as a mnemonic device to help retain information. In case you’re wondering where to find icons, check my Icon Collections page in Resources for suggestions.
These icons were found at Iconfinder.
You can take this approach one step further by accentuating the graphic more than the words. In the social learning screen below, graphic prominence through size is appropriate because of the well-known branding of the platforms shown.
These icons are courtesy of BuildInternet!.com
The Sketch Block font is free for personal use from Dafont.com.
Alternative 3: Let People Speak Your List
When you use people cutouts to speak your points, no one will suspect this is a list. When you buy people cutouts, you get the same person in various poses. You can use these as instructional-agents or as characters in scenarios throughout the course.
These cutout people are from the eLearning Brothers.
The speech bubbles are a free download from Media Militia.
Alternative 4: Wrap the list around a picture
Another simple approach is to find an interesting silhouette at a stock photo site or even to draw a simple geometric shape. Then wrap the list around the silhouette or shape, gently following its contours.
Alternative 5: Draw a Diagram
Then there’s the diagram approach. For a mind map type of diagram, place the topic or category in a circle or ellipse in the center. Then place spokes around this shape in the form of arrows or pointers. Place what would have been a bullet list item at the end of each spoke.
For alternatives to the mind map approach, use a hierarchical chart when list items supersede each other. Also experiment with other graphic formats or with PowerPoint’s predefined diagrams. Just remember to use grouping principles so learners will know which items are related to each other.
Alternative 6: Create a Table
If you analyze your content carefully, you might find that several bullet lists can be associated into one category. If so, then the lists can often be combined into one table. The wondrous thing about a table format is that the values can be either words or numbers. In the computer literacy example below, different multimedia file formats (on the right) are organized into a table by media type (on the left) rather than using four separate bullet lists.
What do you use as alternatives to bullet lists? Comment below.
Join me on Facebook for more about eLearning, graphics and instructional design.
Post from: The eLearning Coach6 Alternatives To Bullet Lists
Connie Malamed
.
Blog
.
<span class='date ' tip=''><i class='icon-time'></i> Jul 15, 2015 06:37am</span>
|
|
"Boy, that escalated quickly." - Ron Burgundy
Teachers always have backup plans; it’s part of our nature - especially those of us who rely on technology when teaching.
But, the best backup plans have backups. And those have backups. And THOSE have backups. In engineering, this is called redundancy. In teaching, it’s called "whatever you do, make sure you are prepared for the worst."
Yesterday’s #hourofcode was a runaway success - literally MILLIONS of students world-wide simultaneously experienced engaging, fun and challenging interactive activities designed to give them a taste of what coding is all about. Those that experienced problems - presuming they had backup plans - were ultimately successful, too. This photo sums up our day:
Yes, we had problems. We adapted, we overcame. We learned to code!
For Day 2, we expect things will be better, but, we’re prepared for anything. (And we’re thankful for the many, many companies that have devoted time and resources to make these experiences possible for our kids - FOR FREE.)
Today, I thought I would profile my Symbaloo for First Grade:
Hour of Code Course #1, Stage 3: solve puzzles to learn the basics of coding! These are our go-to activities in Kindergarten and 1st grade and could be a good start for first graders.
Hour of Code, Course #1, Stage 4: building on Stage 3, the blocks and programming get slightly more complicated, but not too much so. Everyone loves Angry Birds!
Hour of Code, Course #1, Stage 5: More Angry Birds, but this set of activities focuses on debugging or correcting the code.
Tynker: self-paced, 11-lesson set designed to walk students through the basics of coding. The login credentials will be provided to parents under separate cover. The login process, and the actual activities, are best handled with a parent or older sibling.
Hour of Code, Stage 7: These puzzles involve getting a bee to collect some nectar. Very similar to the prior stages but with more words incorporated on the programming symbols.
Hour of Code, Stage 8: No more puzzles here - students program a robot to draw pictures!
Bot-Logic: more of a logic game than a programming lesson, this activity challenges kids to move a robot through a series of increasingly more complicated mazes. Watch out! You’ll be required to add loops and other interactive components to complete them all. <= THIS WAS OUR GO-TO APP FOR FIRST GRADE AND MANY OTHER CLASSES YESTERDAY! IT IS SIMPLE, ELEGANT AND EFFECTIVE! AND, IT WORKED!
Light-Bot: one of the best single activities available, this activity (revamped for this year) requires students to program a robot to light up squares as he walks. The coding takes place by dragging and dropping blocks onto a grid. You remove them by dragging them off. Some of the higher level puzzles can be tricky!
So, there you have it - my best laid plans - let’s see how Day 2 goes!
Mr. Jarrett
Kevin Jarrett
.
Blog
.
<span class='date ' tip=''><i class='icon-time'></i> Jul 15, 2015 06:37am</span>
|
|
I normally try and get along to the BETT (British Educational Training and Technology) Show at London’s Olympia. I made it in 2011 but this year other commitments have got in the way.
Of course BETT is a show aimed at the education market so as a learning technologist and designer working in the commercial sector I’m not part of the core audience but aren’t learning technologies pretty much the same whatever the application? Well actually no, and once you’ve spent a couple of hours wandering around BETT you will see why.
The vast majority of learning technologies at BETT are designed for use within the classroom. Interactive whiteboards, classroom response systems, projectors, even special trolleys that contain banks of iPads or laptops for use in class. Educational learning technologies are all about keeping the power in the classroom. Last year I even struggled to find a Moodle vendor even though this is a massively popular platform in colleges and universities. Outside of education learning technologies are all about taking learning out of the classroom. Why is there such a disconnect? In my view it’s related to the two types of business model. Mainstream education’s business model is based on ‘bums on seats’. Schools and colleges get paid for each student they entice through their doors - there is no model to educate or partly educate online. In the commercial sector however the online learning business model works pretty well - reducing cost and providing flexibility for learners.
Things are changing however - colleges and universities are testing the water with online access to learning (proper learning technologies ). Open Courseware is now available from a number of leading educational institutions such as MIT in the US and The Open University in the UK. Of course Open Courseware is literally the ‘courseware’ which can only be a shadow of the full interactive learning experience (imagine PowerPoint without the presenter and audience). MIT though has recently announced that some of its courses will have free open access - not only to the courseware but also to the tutors, assignments, tests etc.
These are positive moves but the education business model is still rooted in the ‘bums on seats’ model. It always amazes me how one’s business model trumps almost anything else. Even though the research tells us that classroom model is outdated is so many ways we find it hard to change in case we cannibalise our core income stream.
Footnote - Next year BETT moves to Excel - this was a move that the CIPD HRD Show made a few years back and it resulted in poor attendances. As I’m not working in the education space I think it’s unlikely that I will make the trip out to Excel which is a shame because I always enjoyed the very different slant they had on learning technologies.
Related
BETT 2011
Learning Business Models
MIT Open Courseware
MITx
Open University Open Courseware
John Curran
.
Blog
.
<span class='date ' tip=''><i class='icon-time'></i> Jul 15, 2015 06:37am</span>
|
|
We’re two days into #CSEdWeek and #HourofCode and we’ve found our rhythm - sites that work, problems to anticipate, questions to ponder, multimedia to show and words to inspire…
In Grades 2-3-4, I start my lesson with a bit of history, sharing about two very important historical figures whose birthdays are this week - Grace Hopper and Ada Lovelace.:
Grace Hopper and Ada Lovelace. Image credits: computerhistory.org and danielaedintorni.com.
I am really enjoying making a big deal about these two women and how they changed the world. Based on the reactions I’ve seen and heard in class, it’s paying off. I want students, particularly girls, to leave the lesson with the idea that these two technology pioneers literally helped create the world we live in today. They, too, could have similar impact. Why not?
Flocabulary’s excellent "Top Ten Reasons to Code" is also proving to be a big hit:
I love the messaging, the beat, the visuals, the fact that the rapper is a woman, everything about it. It’s just fantastic. Kids are tapping their feet and boppin’ to the beat within minutes, and even though the video moves quickly, they stay with every frame. It really grabs their attention! I even heard a few kids whistling the tune as they leave class. Win!
Moving on … the Symbaloo I want to highlight in this post - 4th grade - has some new and challenging activities:
Tynker: self-paced, 11-lesson set designed to walk students through the basics of coding. The login credentials are the same as the kids use for Google Apps: their full NCS email address and their Google Apps password. Upon logging in, click the blue robot in the circle to access the lessons I’ve selected. BONUS! The good folks at Tynker added a NEW section today specifically for Hour of Code (you see it once you log in.) Tynker is our main focus this week, provided the service works for us in class (it did not last year.) Kids will however be able to select ANY of these activities in class based on their interest and ability. I also want to encourage my students to try Tynker at home. Please do - and let me know how they like it!
Hour of Code Course #1, Stage 3: solve puzzles to learn the basics of coding! These are our go-to activities in Kindergarten and 1st grade and might be a good refresher for second graders.
Hour of Code, Course #1, Stage 4: building on Stage 3, the blocks and programming get slightly more complicated, but not too much so. Everyone loves Angry Birds!
Hour of Code, Course #1, Stage 5: More Angry Birds, but this set of activities focuses on debugging or correcting the code.
Google Blockly - Maze: can you code "Pegman" to complete the series of progressively more challenging mazes!
Hour of Code Course 2: this is the ENTIRE 20-HOUR Hour of Code Course #2 for kids who can read but are new to programming. Some of the activities are included above; plenty of others, including the offline ones, are not.
Light-Bot: one of the best single activities available, this activity (revamped for this year) requires students to program a robot to light up squares as he walks. The coding takes place by dragging and dropping blocks onto a grid. You remove them by dragging them off. Some of the higher level puzzles can be tricky.
Getting Started with Scratch: a simple project designed to show how the programming language Scratch operates. Refer to the "Step Index" on the right and follow the instructions.
Bot-Logic: more of a logic game than a programming lesson, this activity challenges kids to move a robot through a series of increasingly more complicated mazes. Watch out! You’ll be required to add loops and other interactive components to complete them all!
Dancing Yeti: drag and drop code blocks to create a unique dance for the Yeti to perform! Many easy to manipulate variables.
White House Holiday Lights - kids can write code to create elaborate light patterns that ACTUALLY LIGHT UP A TREE AT THE WHITE HOUSE. Seriously! Read about it here.
So there you have it! Onward to Day 4!
Mr. Jarrett
Kevin Jarrett
.
Blog
.
<span class='date ' tip=''><i class='icon-time'></i> Jul 15, 2015 06:37am</span>
|