


Blogs
|
Adobe Captivate 8 Tutorial: Text formatting for different breakpoints in Adobe Captivate 8
This Adobe Captivate 8 tutorial presents the different text formatting options for different breakpoints in Adobe Captivate 8.
The post Adobe Captivate 8 Tutorial: Text formatting for different breakpoints in Adobe Captivate 8 appeared first on VivaeLearning: The Best Free Video Tutorials Online.
Viva eLearning Blog
.
Blog
.
<span class='date ' tip=''><i class='icon-time'></i> Jul 15, 2015 09:28am</span>
|
|
E-learning and mLearning are different from each other and cannot always be used interchangeably. While eLearning has been derived from distance learning, mLearning is derived from eLearning. But, there are certain differences between eLearning and mLearning.
Here is a table that explains how they differ from each other.
Key Features
E-learning
M-learning
Delivery of Content
Learning takes place through desktop or laptop computers.
It requires individuals to be connected to a device from a fixed location, and the learning activity needs to be planned.
Learning takes place through lightweight, wireless devices that are small enough to fit into one’s pocket, purse or hand.
Learners do not have to be confined to a particular location. Therefore, learning can be spontaneous.
Access
Individuals have to be seated comfortably, at a place, to go through the course.
Individuals can access knowledge or learning inputs on the go and need not be seated in one place.
Screen Size & Navigation
Screens are larger and navigation is smooth through mouse pointer. As a result, visuals, graphics and text can be delivered effectively.
The screens of mobile devices are small, limiting the scope for text and graphics. Buttons have to be larger to enable learners to use them with their fingers easily (in contrast to a mouse pointer).
Content Type
Content can be broad-based and can be developed into a curriculum.
Content has to be focused on a single concept and delivered in byte-sized chunks.
Context
In an eLearning course, context needs to be established before adding into the main module.
For example: An eLearning module on the safety measures to be taken while using a piece of equipment will explain why safety measures are important and the precautions to be taken while handle equipment.
M-learning is spontaneous and contextual.
For example: An mLearning module on the safety measures to be taken while using a piece of equipment will have a checklist containing the safety measures which a technician can go through anywhere, anytime.
Time
E-learning modules often span between 20-30 minutes, allowing comprehensive knowledge transfer.
M-learning modules cannot be more than 5-7 minutes as it is difficult for learners to focus on anything longer.
To conclude, it is important to make use of the right method at the right time. E-learning is ideal when comprehensive training needs to be imparted, while mLearning is well-suited to deliver information nuggets or byte-sized learning which can be accessed anytime, anywhere. I hope you find this blog informative. Do share your thoughts.
Related PostsBest Practices for Developing M-learning Courses - An InfographicAssessment Strategy for M-learningM-learning: The Learning Medium of the 21st Century
RK Prasad
.
Blog
.
<span class='date ' tip=''><i class='icon-time'></i> Jul 15, 2015 09:28am</span>
|
|
Designing an eLearning course that engages the learner is the biggest challenge. As instructional designers, we want to create effective online courses. But, we end up starting our eLearning course with a text, graphics and audio narration. The first thing that we need to do is analyze the content. Then, we need to identify the training needs. Create eLearning courses that are "to the point" and help learners decide if your eLearning course will offer them the skills and knowledge they need to achieve their goals. Once we receive inputs from the client, we start analyzing the content and proceed with the next steps.
In this blog, I’ll share a few tips, to design training materials for global audiences. These go a long way in ensuring your courses deliver the right objectives for audiences around the world.
As instructional designers, we should keep some important things in mind while designing corporate training materials for global audiences.
Be sure about the culture variations: Adding competitive games or some role plays may work well for some cultures. It is better to take the help of the SME to avoid involuntary reactions.
Be clear about the use of language: Though English is considered as the language of business, it is a second language for many. Avoid using idioms and colloquialism which are not well-understood.
Pay attention while using numbers: We need to be careful while using numbers in our online courses, especially when they are accessed by global audiences. Indicate how you’d like it to be read when you are writing the date, year, phone number or units of currency.
Use globally accepted images: Use images that are globally accepted. For instance, we can use an image of kids playing soccer to depict teamwork instead of using an image of kids playing baseball which is popular in the U.S., Japan and parts of Latin America.
By following these tips, you can successfully complete your eLearning project and deliver good quality online training products to global audiences.
Related PostsAre You Driving Your Learners Insane? - 4 Annoying E-learning Design Practices4 E-learning Design Tips You Can Use for Safety Training Videos116 Sure-fire E-learning Tips from the Experts in Online Training - Free eBook
RK Prasad
.
Blog
.
<span class='date ' tip=''><i class='icon-time'></i> Jul 15, 2015 09:28am</span>
|
|
Camtasia Studio 8 Tutorial: Using Crop Mode
This Camtasia Studio 8 Tutorial covers the following topics:
0:00 — Intro / Cropping an image
0:35 — Cropping video
0:55 — When to use crop mode
1:20 — Wrap-up / Feedback
The post Camtasia Studio 8 Tutorial: Using Crop Mode appeared first on VivaeLearning: The Best Free Video Tutorials Online.
Viva eLearning Blog
.
Blog
.
<span class='date ' tip=''><i class='icon-time'></i> Jul 15, 2015 09:28am</span>
|
|
Infographics are used in various domains. They are used in websites, newspapers, magazines, advertisements. Last but not the least, they are also used in eLearning. So, what are infographics, why do we use them and when should we use them? In this post, we will look at the answers to these questions.
WHAT: Infographics are learning tools where information is communicated visually. They are used to convey the intended message with the least amount of text. Well-designed infographics reduce cognitive load and make learning memorable.
WHY: The proverb ‘a picture is worth a thousand words’ means to convey a message using one picture. The main purpose of an infographic is to represent complex and large amount of information, clearly, in a way that it is understood at a glance. This is an excellent way to improve retention of information.
WHEN TO USE:
To compare and contrast data: Infographics are ideal to display information such as comparison of two products, and to show dos and don’ts of a process.
To show a timeline: The main purpose of using a timeline infographic is to help learners remember and recall events and dates. A timeline usually consists of a sequence of events that have taken place over a period of time. In eLearning courses, we mostly deal with timelines that display the evolution of a company.
To explain a process: Infographics help in breaking down complicated processes into simpler ones and presenting them in a logical way for better understanding. For instance, the "Procure to pay" process or the procedure to register your name in a database can be explained easily using an infographic.
To show a summary or snapshot: You can get rid of bulleted lists from summary slide by using an infographic. This is an excellent way to impart "last minute" knowledge to your learners.
To show an association of concepts: Infographics can be used to express relationship between similar data (viewing eLearning courses on various smart devices), relationship between categories (statistics of products’ usage in different countries).
An important point to note is that always use infographics when the information on the screen can be best conveyed using visuals.
To conclude, these are some of the interesting ways to communicate information visually. Hope you find them useful.
Related PostsImportant Aspects of a Good Design in E-learning coursesWhat Does It Take to Design Top-notch E-learning CoursesWhy Should Instructional Designers Use Prototypes for E-Learning?
RK Prasad
.
Blog
.
<span class='date ' tip=''><i class='icon-time'></i> Jul 15, 2015 09:28am</span>
|
|
The online medium is used extensively by companies in the healthcare sector to equip their staff members with the needed knowledge and skills. According to a report from Ambient Insight, the revenue of the U.S. corporate market for eLearning products and services is expected to reach $7.1 billion by 2015, out of which, the growth rate of the healthcare vertical will be a staggering 45.1%.
But, what does it take to create a good online training course for healthcare professionals? How can you unleash the power of eLearning to deliver top-notch training to your people? Well, here are a few things that you need to do to develop a good online course for your personnel.
Hope you find this post interesting. Do share your views.
Related PostsE-learning in the Healthcare Sector: Delivering Top-notch TrainingCreative Ways to Present Click on Tab Interactivity in E-learning Courses - An InfographicWhat Are The Trends in E-learning Design and Development? - An Infographic
RK Prasad
.
Blog
.
<span class='date ' tip=''><i class='icon-time'></i> Jul 15, 2015 09:28am</span>
|
|
Adobe Captivate 8 Tutorial: Creating Custom Theme Colors in Adobe Captivate 8
This Adobe Captivate 8 tutorial presents how to create a custom and save a custom theme color palette in Adobe Captivate 8.
The post Adobe Captivate 8 Tutorial: Creating Custom Theme Colors in Adobe Captivate 8 appeared first on VivaeLearning: The Best Free Video Tutorials Online.
Viva eLearning Blog
.
Blog
.
<span class='date ' tip=''><i class='icon-time'></i> Jul 15, 2015 09:27am</span>
|
|
Suppose your company has a large, geographically spread workforce. You have chosen eLearning as the medium of training. The course is developed in English and ready to use. But, will that course be useful to train your global workforce?
The answer is simple: No.
To train your global workforce, you need to deliver online courses in their own language. So, all you need to do is to translate the already developed eLearning course into the respective local language.
Here is an info-graphic which shares 4 best practices of translating your eLearning courses, in quick time and at low cost.
Hope you found it useful. Do you want to add some more points? Please don’t hesitate to do so.
Related PostsTips to Reduce the Cost of E-learning Translation- An Infographic5 Steps for Excellent Translation of Online Courses5 Proven Tips for Better E-learning Translations - An Infographic
RK Prasad
.
Blog
.
<span class='date ' tip=''><i class='icon-time'></i> Jul 15, 2015 09:27am</span>
|
|
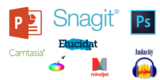
8 eLearning Software Tools To Speed Up eLearning Content Development
Attention eLearning managers: are you looking for useful tools to help your team create more eLearning faster? In this post, I’ll share the tools I love to use and show you how to use them to speed up your own eLearning development.
1. Elucidat
Elucidat is a simple authoring tool that can help you speed up the eLearning development process. Instead of using desktop tools that are great for small or one-person development teams, cloud-based tools like Elucidat are better designed for high-volume eLearning teams. Elucidat helps me author, publish and maintain eLearning faster than a desktop tool.
Here are my favorite Elucidat features:
Inbuilt comments and reviews so you and your team can all work in one place
Ready-to-go themes to help you get started quickly
Republishing feature that lets you quickly update courses without needing to publish and deploy again
Related: Learn how Utility Warehouse used Elucidat to deliver elearning to 46,000 learners
2. PowerPoint
PowerPoint is a great tool! Once you forget about it being a presentation tool and think about it being design software, it can be great for storyboarding. It provides a visual way to present designs and entire briefs to your development team.
I use PowerPoint to create my own graphics. After I save an object as an image, I import it into my eLearning software.
PowerPoint’s image effects feature can help you manipulate existing images. For example, you can use it to quickly work up decent visual designs similar to these used in Haji Kamal.
Related: Draw inspiration from this comic book tutorial
3. Audacity
Audacity is an audio editor and recorder. You can record live from a microphone or easily edit previously-recorded material. I use Audacity to create voiceover files. You can also use it to help you:
Remove background noise
Reduce or amplify volume
Manipulate speed, pitch and tempo
Fade in and out
4. Camtasia
Camstasia is a screen-recording and video-editing tool that lets you capture anything on your screen as a video. It allows for zooming in and out, panning animation effects and audio effects including fading and noise removal. You can add and customize callouts to enhance your video, which is an especially useful feature in training videos.
I use Camtasia to bring together my images, sound files, video clips and audio. It makes it easy to arrange all my clips into a flowing video and is great for creating animations that zoom in on the recording to draw learners’ attention to specific action in the video.
My favorite features that can help you save time when editing videos:
Cut and split clips on the timeline
Edit the audio and add voice narration
Add title clips and transitions
Add callouts, captioning or cursor effects
5. Snagit
Snagit lets you capture images and videos with just a few clicks. You can quickly take screen captures and highlight the important stuff using the built-in markup tools. Snagit enables you to take screenshots, capture screen videos and take mobile captures.
I use Snagit to grab screenshots of virtually anything I want. For example, I use Snagit to quickly provide feedback, create clear documentation and enhance the way I work with my team members and clients.
Elearning inspiration: Virgin Media used Snagit to empower employees to share knowledge company-wide
6. Adobe Photoshop
Adobe Photoshop is a design program that lets you compose and retouch images and photos. It has a full suite of painting tools like brushes, pencil, airbrushing and cloning. It has pretty much everything you want in a graphics package.
Alternatively, for the less skilled, you can try Canva. Canva is a very simple design tool to help you create stunning graphics really quickly!
7. ColorPic
ColorPic is a desktop tool that quickly lets you create color palettes for your eLearning courses. You can pick any color from your screen simply by putting your mouse over it. So if you have your corporate identity/branding kit, you can simply grab the colors from the screen and add it straight into your palette. For Mac users, Sip is a great alternative.
8. MindManager
MindManager is a fast mind-mapping tool that you can use to quickly gather requirements and map out content into chapters or topics.
I use it to organize my courses and curricula. It can also be easily incorporated into a design documentation or design brief.
You can use mind-mapping tools to help you visualize the way your branching logic will work in your eLearning scenario.
What eLearning software tools do you use?
These are eight of my favorite eLearning software tools that I use on a regular basis. I challenge you to try some of these tools and see if they can help you speed up eLearning development.
Have I missed any must-use tools? Share your favorite eLearning tools in the comments below.
This post was first published on eLearning Industry.
eLearning Industry
.
Blog
.
<span class='date ' tip=''><i class='icon-time'></i> Jul 15, 2015 09:27am</span>
|
|
Camtasia Studio 8 Tutorial: Remove a Color
This Camtasia Studio 8 Tutorial covers the following topics:
0:00 — Intro
0:30 — Tips for setting up the shot
2:00 — Removing the color in the editor
2:55 — Adjusting the sliders
4:40 — Final tips
5:20 — Wrap-up / Feedback
The post Camtasia Studio 8 Tutorial: Remove a Color appeared first on VivaeLearning: The Best Free Video Tutorials Online.
Viva eLearning Blog
.
Blog
.
<span class='date ' tip=''><i class='icon-time'></i> Jul 15, 2015 09:27am</span>
|