


Blogs
|
I have had a free VRoom with Elluminate for awhile now which I have to admit that I haven’t used as it only allowed for three participants to use it at a time. Still, I kept in tucked away as possibly being useful at some future point so was interested to get an email from Elluminate asking me to register with a new service called ‘Learn Central’ which is being sponsored by Elluminate or else I would loose my VRoom.
Learncentral logo
I dutifully followed the link and signed up on this network (and you can too at www.learncentral.org). What I instantly found very exciting is that they are offering the use of Elluminate meeting tools for free through the Learn Central platform to hold meetings for up to 300 participants! I copied the information below from the website written by Steve Hargadon who is a well known ICT educator:
LearnCentral allows educators to use a free public Elluminate room to hold large webinars or group meetings. To qualify, the events must be 1) education-oriented, 2) free (you’re not charging those who attend), 3) recordable, and 4) open to anyone to attend. We’re really excited to see what you do with this capability, and are hoping that it allows you to regularly gather other educators around curricular interests in "historic" ways.
The current instructions are below. This is a new service, so your feedback and help are greatly appreciated!
Before Scheduling a Meeting
We ask that you go through the live or recorded free Elluminate training (http://www.elluminate.com/support/training/index.jsp) before hosting a session, and suggest strongly that you attend another session as a participant to see how an Elluminate session works. Please don’t go in without any actual experience-it won’t be good for you or your attendees! :) This is an honor system, but we do ask that you are prepared as we don’t want these free sessions to reflect poorly on Elluminate!
To Schedule a Meeting
To schedule a meeting in the LearnCentral public-use Elluminate room, please create the event using the calendar for this group by going to the events tab here and clicking on "Create Event." Please check the calendar first and take care not to schedule over another event. Please also leave at least 30 minutes before and after each event (so that you and the organizer who follows you both have time to come into the room to prepare before your events).
The URL to put in the calendar event, or to give out to others to attend, is https://sas.elluminate.com/d.jnlp?sid=lcevents&password=Webinar_Guest. You can also use this shortened version: http://tinyurl.com/lcparticipant. Participants do not need to be members of LearnCentral to attend the event, but please encourage them to join!
Once your event is scheduled in the group calendar, you are welcome to also add it to the calendars of other groups you are a part of. If you believe your event might be of interest to the LearnCentral community as a whole, please email me at stevehargadon@elluminate.com so that I can place it on the community calendar. You also need to email me for the moderator log-in information of this is your first time holding a LearnCentral Elluminate meeting.
Please keep meetings to under two hours in order for others to be able to use the room. If you need a session that is longer than two hours, please contact me directly. Also, the LearnCentral Elluminate room has limit of 300 participants. If you believe that you will need to accommodate more than this number, please contact me directly as well.
I think this is a great service as normally it is fairly expensive to book an Elluminate session. I would have found this useful when running online meetings for ICT PD this year and I’m sure others could find great uses for it too.
Suzie Vesper
.
Blog
.
<span class='date ' tip=''><i class='icon-time'></i> Jul 16, 2015 08:48am</span>
|
|
If you want to add fun and joy to your lesson with some music, here is a great web tool for this! It’s called LyricsGaps. With this tool, you can watch and listen a song, fill in the gaps of the lyrics using different tools.
There are hundreds of songs that you can choose from in different languages. When you find your song, you choose a game mode. It can be karaoke, where students sing the song in a karaoke mode. You can choose the quiz, where the lyrics of the songs are in a multiple quiz form. Here, students listen and choose the correct words in the lyrics. Or, you can choose a level among beginner, intermediate or expert and the lyrics of the words come again like a quiz where the words are in a drop down menu. As the students listen to the song, they choose the right words.
You can also create a teacher’s account and create your own quizzes for your students with the words that you have chosen. When you are done, you can share the customized quiz with your students.
Also, when you click on any word, it gives you the definition of it which makes this tool much better!
How to use this tool:
Choose different level of songs for your students and let them try different game modes.
Let your students create their own games modes for each other.
Have a kareoke party in class!
Enjoy singing and listening the songs!
Ozge Karaoglu
.
Blog
.
<span class='date ' tip=''><i class='icon-time'></i> Jul 16, 2015 08:48am</span>
|
|
I’ve just checked out the list of Edublog nominations and was happily surprised to see this blog in the list of those nominated for ‘Best resource sharing blog’. Given that I haven’t been updating as much recently, I was pretty chuffed to still be included. Thanks to those that nominated me That will help keep me making the effort to blog.
Suzie Vesper
.
Blog
.
<span class='date ' tip=''><i class='icon-time'></i> Jul 16, 2015 08:48am</span>
|
|
Carbonmade Website
Carbonmade lets you display and manage your portfolio online by providing a variety of simple tools. The core idea behind the design is to keep your images and videos at the forefront, so they’re always the focus. Free account allows up to 5 projects and 35 images.
What do you think of Carbonmade?
Patricia Donaghy
.
Blog
.
<span class='date ' tip=''><i class='icon-time'></i> Jul 16, 2015 08:48am</span>
|
|
We are all looking for ways to connect with our students in and out of the classroom. And, here is an easy to use tool that we can use for different purposes.
TodaysMeet is a backchannel which means to have an online and real time conversation. It is like an online chat room where everyone can send messages and interact with each other.
You don’t need to sign up to use this tool. Simply, name your room and decide on how long the data will be saved. Then, share the link of your room with others so that they can participate.
Each participant follows the link, write their names or nicknames and start talking. You don’t need to register or download a software to use this tool. The tool is also ad free which makes it more powerful.
A few ideas to use this tool in class:
As the students are presenting a project or a topic to each other, they can post their questions on TodaysMeet so that when the presentation is over, the questions can be answered.
Students can write their feedback or their reflections about lesson/ presentation/ activity or a story that they have read.
In groups, they can write a dialogue.
Students can brainstorm about a topic.
You can hold a debate using this tool.
I think, this simple tool can be a nice and an easy step to mobile learning in the classroom!
Ozge Karaoglu
.
Blog
.
<span class='date ' tip=''><i class='icon-time'></i> Jul 16, 2015 08:48am</span>
|
|
This is a post for Mac users about the useful colour tips and tools that you can install for free on a Mac. I got these from a post by Robin Wood and have already found them incredibly useful.
The post goes into great detail about how to use the Mac built in colour picker which you will be familiar with when using Mac applications. I learned a LOT about how to use this after reading the post. It is always amazing how some things you use all the time can do so much more than you realised. I had no idea about building custom colour palettes or creating palettes from images on my computer before reading his post.
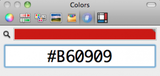
It also gives links to a couple of great free tools that add extra power to the colour picker. One of these is a free plugin for the colour picker called ‘Hex Color Picker’ which will give you the colour code for any colour and not just restrict you to web safe colours. I find this very useful for when picking colours for my wikis etc.
There is also another plugin related to the Adobe Kuler colour palette generating tool. It will go out to the website and show you the latest and highest rated palettes created by Adobe Kuler users for you to use.
Probably, one of the most useful things about Robin’s post is that he has included a script he has written that turns the colour picker into a stand alone application rather than just something that opens in other Mac applications. This is very useful for me as I can use it now to pick colours out of websites rather than have to take a screen grab and then open it in a Mac application to sample the way I used to!
Suzie Vesper
.
Blog
.
<span class='date ' tip=''><i class='icon-time'></i> Jul 16, 2015 08:48am</span>
|
|
Nota Website
Nota enables you to mash your ideas and media together with others in a dynamic whiteboard wiki. Using photos, videos, and other web content you can instantly create brainstorms, presentations, scrapbooks, and enjoy an interactive chat with more than 50 people.
What do you think of Nota?
Patricia Donaghy
.
Blog
.
<span class='date ' tip=''><i class='icon-time'></i> Jul 16, 2015 08:48am</span>
|
|
As you may know, I and my colleague Demet Küyük have been developing mobile applications that are created by children. You can check several of them here!
For next year, we are planning to develop a new educational application. It will be a digital storytelling app that will be student - generated. For this, we will need some pictures that are drawn by children themselves.
So, if your students are 6 to 10 years old and if you would like to be a part of this iPhone/iPad/Android application/ project with your students, please mail me here: ozge_karaoglu@hotmail.com
I will be sending you the details on a seperate e-mail.
We are looking forward to collaborating with you!
Ozge Karaoglu
.
Blog
.
<span class='date ' tip=''><i class='icon-time'></i> Jul 16, 2015 08:48am</span>
|
|
There are a few tools around for embedding books and documents into websites. I have historically always been a fan of Scribd where I can upload my docs and pdfs for embedding into my wikis. Recently I have found another couple of options and am now trying to figure out which I would use. I have looked at three below and embedded a version of the same document from each one to show their differences.
I like the large Scribd community and the fact that when I embed docs into Scribd, they are easy to read at full size with the ability to scroll down them. I also like the stats I get about how many views and downloads the document has had. The embedded objects also autofit themselves to the space available whereever I embed them which is handy. It can be a pain that people have to sign up for a Scribd account to be able to download the documents I share.
VoiceThread
Youblisher is a new one I’ve just started playing with (thanks Allanah for the post that alerted me to this one). I like the page turning effects and the overall look but am not sure that I like the way it takes you out of your site to view it or the fact that you have to zoom in to be able to easily read standard sized text. I do like the fact that it looks neat and tidy on the page when embedded and that it is super easy for people to download by clicking the down arrow beneath the embed. It is interesting that I can’t seem to find where to get the embed code when looking at other people’s books - I only seem to be able to access it when I create my own books.
Today I also signed up for Issuu which is another self-publishing platform. This one is very customisable with different ways to embed the document and three different views: one called magazine style with the two pages, presentation style with one page at a time, and paper style with pages that you can scroll down through (like Scribd). I like the fact that you can view an embedded book in full screen mode and then change between the viewing styles using the options that appear when you run your mouse over the top centre of the book space. You also get very good statistics for the document. You do still need an account to download the document though like Scribd.
Magazine Style
Paper style
So what do you think? Which one do you like the best and why?
Suzie Vesper
.
Blog
.
<span class='date ' tip=''><i class='icon-time'></i> Jul 16, 2015 08:47am</span>
|
|
Nowadays kids take rather more than packed lunches and books to school with them. From mobile phones and blu ray devices to Toshiba laptops and USB drives, they’re fully wired up and the kit they carry about with them on a daily basis can amount to a tidy little sum.
The problem in the past used to be kids misplacing their trainers or homework but now parents rightly worry that their accident-prone child is going to accidentally offload their smartphone or portable DVD player rather than just a pen or ruler as of yore.
Nonetheless, there are a few sensible steps parents can take when choosing technology items which kids these days seemingly can’t manage without.
Laptops
With laptops, for instance, you can try to get them one with a solid-state drive which has no moving parts and can put up with all sorts of rough treatment without crashing and go for a spill-proof keyboard wherever possible too. Smaller screens are less prone to breakage than larger ones and a netbook might actually be a better idea than a laptop in that respect.
You should make sure that it has all the antivirus and anti-malware programs loaded as well because kids typically frequent sites that are dubious to say the least and which are adept at spreading infections. Kids also need to be taught about the dangers of opening email attachments and links and of visiting suspicious-looking websites.
You can get a proper laptop bag for the machine to carry it separately from books, pens and other school-related equipment to reduce the chance of damage. If parents and kids share the same machine, password protection is also a must; with kids the fine line between curiosity and downright invasion of privacy is often blurred.
Mobile phones
If mobile phones have their own cases and preferably be attached to a belt rather than shoved into a back pocket, that would help too. We may try installing specialist software so that should the device be lost or stolen it can easily be tracked.
As with all such devices, kids need to be warned about the risks of web surfing and even of chatting online with friends. With cyber bullying, malware and phishing rife in the online world, using a mobile phone can be as risky as using a regular PC and in fact more so because of its sheer convenience.
Encrypted USB drives
You can pay a small amount extra to have a computer’s USB drives encrypted, to protect things like school assignments that could be lifted by someone else and passed off as their own effort. A password will protect any data on the machine so that only the rightful owner can access it.
Best practice when using technology can result in valuable lifelong habits, such as keeping a close eye on all devices when out and about and making regular backups of all important data. Many of us fail the test here, so it’s doubly important that our kids get it right.
Ozge Karaoglu
.
Blog
.
<span class='date ' tip=''><i class='icon-time'></i> Jul 16, 2015 08:47am</span>
|